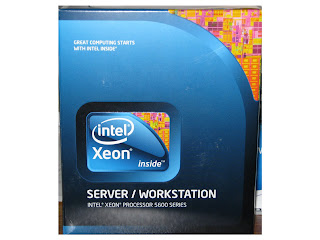
To build our private cloud environment we needed a powerful hardware which could host our multi functional VM's.
After quite a research by Ratanshaw and Nasir Khan we made the decision to buy dual socket Intel server board S5500BCR and Intel Xeon 5600 series CPU. Initially we purchased single Xeon E5620 CPU unit and Kingston 16GB DDR3 (4GB each) memory which is enough to test the hardware on VMware ESX™ 4 platform. Hopefully will buy the 2nd CPU unit with additional 16GB DDR3 memory. Before even purchasing the hardware we planned to place the motherboard on rack without casing ;), But as our office is in the process of revamp we ditched the plan to protect our new beast with the dust and bought the Cooler Master casing (CM 690 PLUS) with 600W power supply. The hardware is all installed and ready for
power-up. Pics shows the detail of the hardware.
Saturday, June 26, 2010
Saturday, December 12, 2009
Conficker Revisited
Conficker infected machines tend to knock on Windows boxes exposed over the network. Be it Windows boxes on your internal LAN or your Internet facing boxes with wrong ports exposed over the Internet.
Be sure to firewall your Internet facing boxes, Conficker infected machines keep trying common username and password combination in order to get into a machine. As a side effect this brute force attack can lockout users and slowdown domain authentication on a domain because of many password attempts if the box that is being attacked happens to be connected to a Windows Domain/Active Directory.
One way to detect the source of Conficker or similar malware attacks is to enable Security Audting on the Windows Servers. Infected machines try hundreds of password combination per minute on machines that they can find over the network. The only way to identify such machines to run EventCombMT on all the suspect servers.
EventCombMT is a multithreaded tool that you can use to search the event logs of several different computers (not just DCs, as we discovered later) for specific events, all from one central location. EventCombMT is part of Account Lock Tools (ALTools) from Microsoft.
EventCombMT has a pre-canned search for events related to account lockout (Event IDs 529, 644, 675, 676, and 681). To search the event logs for account lockouts, follow these steps. The final step is to open the exported .csv in Excel and generate list of offending IP addresses.
Friday, September 25, 2009
Using CentOS as Internal Mail Relay Server
This note provides steps in building a CentOS server to act as an internal mail relay gateway for Internet bound emails. All internet emails are relayed through the ISP account using ISP mail server as Smart host.
These steps were tested on CentOS 5.3 using Networksolutions.com mail relay account. Networksolutions like many other paid services require senders to authenticate before they can relay email through their servers.
1. Download and install Postfix using Yum
yum install postfix
2. Download and install system-switch-mail to change MTA from Sendmail (default) to newly installed Postfix
yum install system-switch-mail
3. Create /etc/postfix/sasl_passwd containing password for the mail server relay account:
smtp.yourdomain.com username@yourdomain.com:password
4. Edit /etc/postfix/main.cf and add the following lines to the end of file:relayhost = [smtp.yourdomain.com]
smtp_sasl_auth_enable = yes
smtp_sasl_password_maps = hash:/etc/postfix/sasl_passwd
smtp_sasl_security_options =
smtp_generic_maps = hash:/etc/postfix/generic
Note: It is assumed that your ISP allows you to connect to port 25 on the host smtp.yourdomain.com if this is not the case (for example your ISP allows only higher numbered ports like 2525) then you can change the relayhost entry to something like this:
relayhost = [smtp.yourdomain.com]:2525
5. Edit /etc/postfix/generic and add the following line to the end of file:
@yourmachinename.localdomain username@yourdomain.com
The generic translation is needed because the Default machine names are something like yourmachinename.localdomain (or it could be localhost.localdomain if you have not configured the hostname) and Sender address will be username@yourmachinename.localdomain (such sender addresses are rejected as SPAM).
You have to tell postfix to change the Sender address from something like root@yourmachinename.localdomain to username@yourdomain.com.
6. Generate hash for /etc/postfix/generic:
postmap hash:/etc/postfix/generic
7. Secure sasl_passwd file as it contains credentials:
chown root:root /etc/postfix/sasl_passwd
chmod 600 /etc/postfix/sasl_passwd
8. Generate hash for /etc/postfix/sasl_passwd:
postmap hash:/etc/postfix/sasl_passwd
Subscribe to:
Posts (Atom)